Creating a Custom Widget Designer using Sitefinity and Sitefinity Thunder Part 1

The content you're reading is getting on in years
This post is on the older side and its content may be out of date.
Be sure to visit our blogs homepage for our latest news, updates and information.
Description
This blog posts intends to cover the newest way to create custom Designers for your widgets. This post is meant to be an addendum to Josh Morales’ excellent blog post entitled Selecting Sitefinity 4 Content Inside Widget Designers, which was posted on October of 2011. Since that time Sitefinity Thunder has added features that will make building your designers much easier and a less time consuming affair. In addition, some of the anatomy that composes the Designer and its supporting files have changed since Josh’s post and are no longer valid in later editions of Sitefinity.
Rather than completely recounting Josh’s post word for word I’m going to instead focus on showing you how you do essentially the same thing he outlined, but using the newest means available to Sitefinity.
In this post we will create a custom widget with 4 controls used by our Widget and its supporting Designer:
- A Hyperlink control on the Widget, which is fed by a Page Selector control on the Designer
- An Image control on the Widget, which is fed by an Image Selector control on the Designer
- A Repeater control on the Widget, which is fed by a Tag Selector on the Designer
- A Repeater control on the Widget, which is fed by a Category Selector on the Designer
Please note that Thunder has an automated way of adding some dialogs, like the Page and Image Selectors, automatically to the Designer files, rather than adding them manually. Since this is the case we will be adding the Page and Image Selector dialogs first part of this post and then subsequently adding the Category and Tag Selector dialogs manually in the second part.
Prerequisites:
- Visual Studio and the Sitefinity Thunder plugin
- At least one Sitefinity page created in your project
- At least one image uploaded into a Sitefinity Album Library
- At least one Category created in your Categories Taxonomy
- At least one Tag created in your Tags Taxonomy
While I don’t think this tutorial is overly complex it does touch on a number of components that might be too advanced for someone who is new to Sitefinity development. If you are new, then I might suggest familiarizing yourself with Thunder and creating custom widgets first. If you do find yourself lost or confused you can always refer to code, which has been uploaded to a Github repository and ready for your download.
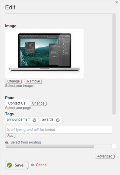
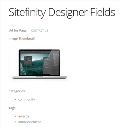
Once we have completed the project we will have a custom widget and its associated designer that will look similar to the following:
Figure 1- Designer
Figure 2- Page with custom widget
Building the Widget with the Page and Image Controls
Use Thunder to create a new custom widget, but WITHOUT a designer.
Right click on the folder where you want the new widget to reside within your project. I named and located my folder: “~\Custom\CustomDesignerExample” and the widget: “CustomWidget.cs”. You can rename your folder and widget to whatever you’d like, just make sure to keep the names consistent if you re-use any of the provided code.
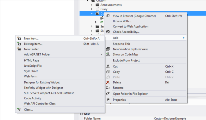
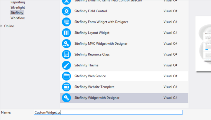
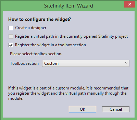
Make sure to leave “Create a designer” unchecked in the next wizard section. Check “Register the widget in a toolbox section” and then select a desired place in the “Toolbox section” dropdown. Click OK and your widget will be created and registered with your Sitefinity project.
Add the following Asp.Net controls and their supporting properties and methods to your custom widget’s UI and code-behind files.
UI Controls:
<%@ Control Language="C#" %><style type="text/css"> .mylinks { padding: 0 5px; text-transform: uppercase; font-size: 12px; color: #00b4c9; }</style><h1>Sitefinity Designer Fields</h1><div> <p> <strong>Page: </strong> <asp:HyperLink ID="PageLink" runat="server" CssClass="mylinks" /> </p></div><div> <p> <strong>Image Thumbnail:</strong> <br /><br /> <asp:Image ID="Thumbnail" runat="server"/> </p></div>Code-behind Using Statements
using System;using System.Collections.Generic;using System.Linq;using System.Web.UI.WebControls;using Telerik.Sitefinity.Modules.Libraries;using Telerik.Sitefinity.Modules.Pages;using Telerik.Sitefinity.Taxonomies;using Telerik.Sitefinity.Web.UI;
Code-behind Properties:
/// <summary>/// guid from designer for our selected page/// </summary>public Guid SelectedPageID { get; set; }/// <summary>/// guid from designer for our selected image/// </summary>public Guid SelectedImageID { get; set; }/// <summary>/// source url for our image/// </summary>public string SelectedImagePath { get; set; }Code-behind Control References:
/// <summary>/// Reference to the HyperLink control that shows the page url./// </summary>protected virtual HyperLink PageLink{ get { return this.Container.GetControl<HyperLink>("PageLink", true); }}/// <summary>/// Reference to the Image control that shows the image thumbnail./// </summary>protected virtual Image Thumbnail{ get { return this.Container.GetControl<Image>("Thumbnail", true); }}Code-behind - Add 2 method calls to the existing InitializeControls method:
/// <summary>/// Initializes the controls./// </summary>/// <param name="container"></param>/// <remarks>/// Initialize your controls in this method. Do not override CreateChildControls method./// </remarks>protected override void InitializeControls(GenericContainer container){ GetPageLinkInfo(); GetImageThumbnail();}
Code-behind Methods:
/// <summary>/// Sets the url and title for your page link control/// </summary>public void GetPageLinkInfo(){ var mgr = PageManager.GetManager(); var pageNode = mgr.GetPageNode(SelectedPageID); PageLink.NavigateUrl = ResolveUrl(pageNode.GetFullUrl()); PageLink.Text = pageNode.Title; PageLink.Target = "_blank";}/// <summary>/// Sets the selected image's thumbnail to your thumbnail control/// </summary>private void GetImageThumbnail(){ LibrariesManager libraryManager = LibrariesManager.GetManager(); var selectedImage = libraryManager.GetImage(SelectedImageID); Thumbnail.ImageUrl = selectedImage.ThumbnailUrl; Thumbnail.AlternateText = selectedImage.AlternativeText;}
Now recompile your project in Visual Studio. If everything compiled without error, then congratulations! You now have a very simple custom widget that has been registered in the backend of you project and can be “drag and dropped” on to your pages and templates.
Building the Designer
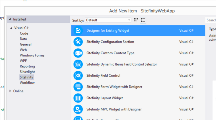
Using Thunder right click on the folder where you added your custom widget and add a new item.

Now select “Designer for Existing Widget”. I called my Designer “CustomWidgetDesigner.cs”, but you can name it whatever you’d like, just be sure to keep the name consistent in case you use the provided code samples.
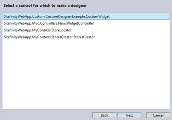
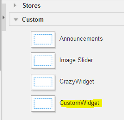
In the next screen you will select the custom widget that you created previously. Mine was called CustomWidget, so that is what will show up in the “Select a control for which to make a designer” dialog.
If you don’t see your control listed, then you probably didn’t recompile your project after creating your custom Widget. Cancel out of the wizard, recompile and repeat the above steps. Make sure you have no errors when you recompile. You can also verify that your Widget was registered by looking in the designated Sitefinity Drag and Drop Toolbox section you added your Widget to by opening one of your Sitefinity Pages for edit.
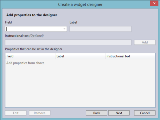
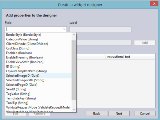
If you were able to select your Widget in the above dialog, then you will proceed to the “Add properties to the designer” screen. Here is where you will add your Page and Image selectors GUIDS that you added to your custom Widget code-behind.
Click on the Field dropdown and select the Image or Page property GUIDs.
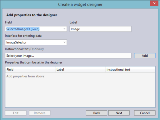
Now update your “Label” as desired. Click the “Interface for entering data” dropdown and select the appropriate control interface type.
Click “Add” and repeat for the Page Selector.
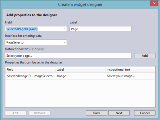
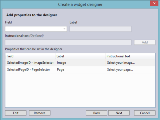
Make sure you have all of your desired Designer controls added before proceeding. When finished, click next and complete the wizard. Your Designer is now completed and ready to be used.
Your new folder should have the following contents:
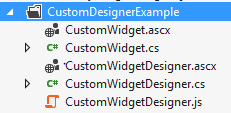
Your file names may be different, but you should have the same amount and types of files.
Open up your corresponding CustomWidget.cs file and take a look at the decorator above the class declaration. This is where the designer is associated with your widget:
[Telerik.Sitefinity.Web.UI.ControlDesign.ControlDesigner(typeof(SitefinityWebApp.Custom.CustomDesignerExample.CustomWidgetDesigner))]public class CustomWidget : SimpleViewIf you find that you have issues with your Designer and want to start over, then remove this decorator and delete your Designer files. Thunder will now recognize that your control doesn’t have a Designer associated with it and you can now go through the wizard again.
If all is good, then recompile your project. If there are no errors, then run your Sitefinity project in your browser of choice. When your site has loaded, login to the backend, create a page, drag and drop your new custom Widget on to it and then click your Widget’s “Edit” button. You’ll be given the following Designer dialog to select your Image and Page:
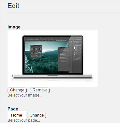
This completes the Image and Page dialog section of the Designer. Please proceed to Part II to see the exciting finale of Creating Custom Designers…
Please proceed to Creating a Custom Widget using Sitefinity and Sitefinity Thunder Part 2
Sample Code
Please go to my Github Repository to download the sample project.
David Cowart
View all posts from David Cowart on the Progress blog. Connect with us about all things application development and deployment, data integration and digital business.
Comments
Topics
- Application Development
- Mobility
- Digital Experience
- Company and Community
- Data Platform
- Secure File Transfer
- Infrastructure Management
Sitefinity Training and Certification Now Available.
Let our experts teach you how to use Sitefinity's best-in-class features to deliver compelling digital experiences.
Learn MoreMore From Progress
Latest Stories
in Your Inbox
Subscribe to get all the news, info and tutorials you need to build better business apps and sites
Progress collects the Personal Information set out in our Privacy Policy and the Supplemental Privacy notice for residents of California and other US States and uses it for the purposes stated in that policy.
You can also ask us not to share your Personal Information to third parties here: Do Not Sell or Share My Info
We see that you have already chosen to receive marketing materials from us. If you wish to change this at any time you may do so by clicking here.
Thank you for your continued interest in Progress. Based on either your previous activity on our websites or our ongoing relationship, we will keep you updated on our products, solutions, services, company news and events. If you decide that you want to be removed from our mailing lists at any time, you can change your contact preferences by clicking here.
