Customizing Sitefinity’s dialogs
The content you're reading is getting on in years
This post is on the older side and its content may be out of date.
Be sure to visit our blogs homepage for our latest news, updates and information.
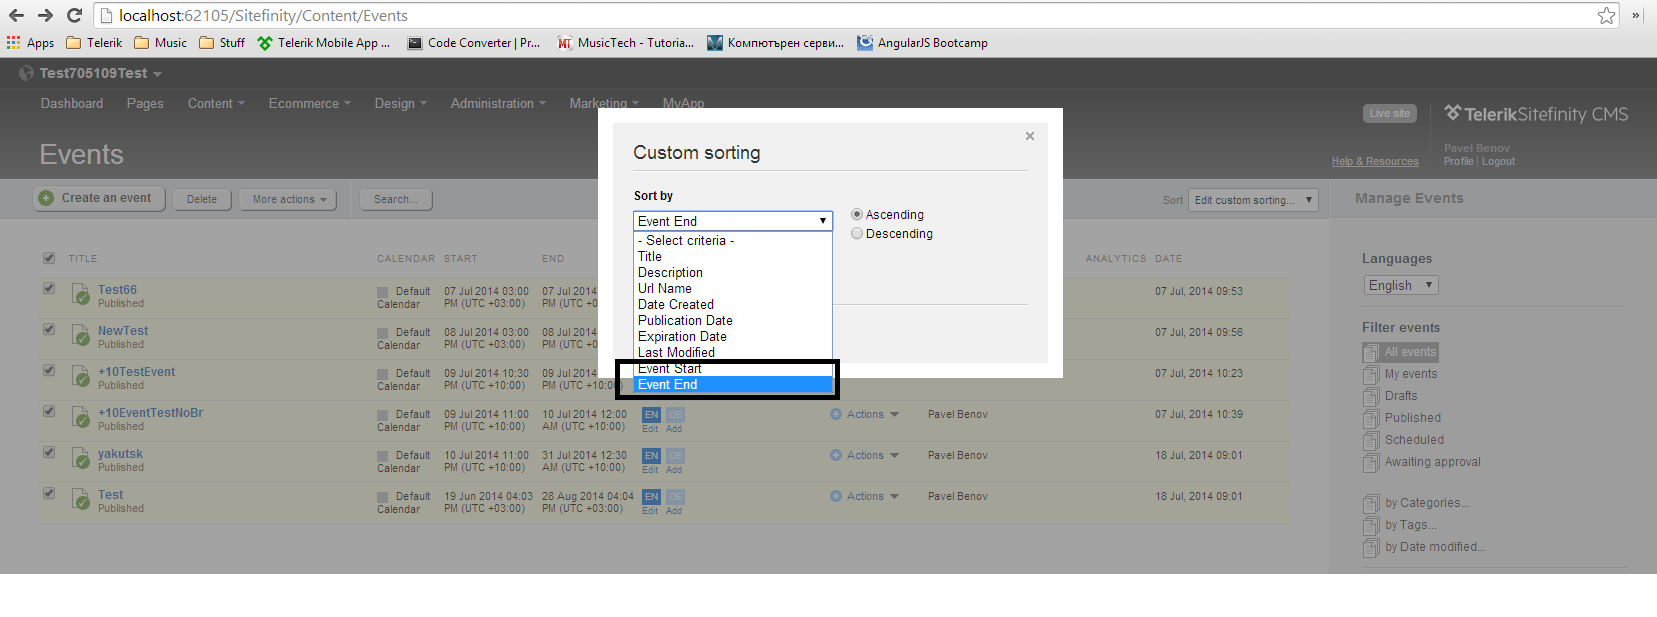
Customizing Sitefinity’s built-in dialogs is a commonly requested scenario, so in the following blog post we will demonstrate how you can achieve this. For the purpose of this demo we are going to customize the CustomSortingDialog for Events module, located in Content->Events and choosing the Custom sorting… option in the upper right corner sorting drop-down menu.
All dialogs available in Sitefinity are resolved through Unity. This way you can easily replace any of the built in dialogs with custom ones that suffice for your application scenarios.
Implementing the custom dialog class.
As usual, we need to first inherit from the base dialog class:
using System;using System.Collections.Generic;using System.Linq;using System.Web;using Telerik.Sitefinity.Web.UI.Backend.Elements;namespace SitefinityWebApp{ public class CustomSortingDialogCustom : CustomSortingDialog { }}We are going to insert 2 more sorting criteria – EventStart and EventEnd. For the purpose of this we need to override the GetSortableFields() method and add the 2 additional options to the collection bound to the drop-down list.
using System;using System.Collections.Generic;using System.Linq;using System.Web;using Telerik.Sitefinity.Events.Model;using Telerik.Sitefinity.Web.UI.Backend.Elements;namespace SitefinityWebApp{ public class CustomSortingDialogCustom : CustomSortingDialog { public override IList<KeyValuePair<string, string>> GetSortableFields() { var baseSortableFields = base.GetSortableFields(); if (this.ContentType == typeof(Event)) { baseSortableFields.Add(new KeyValuePair<string, string>("EventStart", "Event Start")); baseSortableFields.Add(new KeyValuePair<string, string>("EventEnd", "Event End")); } return baseSortableFields; } }}Registering the dialog
Our custom dialog is now ready and all that is left is to register it. You can do this in Global.asax on the Bootstrapper_Initialized event like so:
protected void Application_Start(object sender, EventArgs e) { Bootstrapper.Initialized += Bootstrapper_Initialized; } void Bootstrapper_Initialized(object sender, Telerik.Sitefinity.Data.ExecutedEventArgs e) { if (e.CommandName == "Bootstrapped") { ObjectFactory.Container.RegisterType(typeof(DialogBase), typeof(CustomSortingDialogCustom), typeof(CustomSortingDialog).Name, new HttpRequestLifetimeManager()); } }After building the project and running it in the browser our customized dialog is registered and the changes can be seen.
Pavel Benov
View all posts from Pavel Benov on the Progress blog. Connect with us about all things application development and deployment, data integration and digital business.
Comments
Topics
- Application Development
- Mobility
- Digital Experience
- Company and Community
- Data Platform
- Secure File Transfer
- Infrastructure Management
Sitefinity Training and Certification Now Available.
Let our experts teach you how to use Sitefinity's best-in-class features to deliver compelling digital experiences.
Learn MoreMore From Progress
Latest Stories
in Your Inbox
Subscribe to get all the news, info and tutorials you need to build better business apps and sites
Progress collects the Personal Information set out in our Privacy Policy and the Supplemental Privacy notice for residents of California and other US States and uses it for the purposes stated in that policy.
You can also ask us not to share your Personal Information to third parties here: Do Not Sell or Share My Info
We see that you have already chosen to receive marketing materials from us. If you wish to change this at any time you may do so by clicking here.
Thank you for your continued interest in Progress. Based on either your previous activity on our websites or our ongoing relationship, we will keep you updated on our products, solutions, services, company news and events. If you decide that you want to be removed from our mailing lists at any time, you can change your contact preferences by clicking here.


