Sitefinity 4 (Beta) Project Manager Part 2: IIS Virtual Directory Support
The content you're reading is getting on in years
This post is on the older side and its content may be out of date.
Be sure to visit our blogs homepage for our latest news, updates and information.
In my last post on the new Sitefinity Project Manager, I went through how Sitefinity 4 now automates the creation of new blank projects, using an integrated web server to run file-system-based projects. However, Sitefinity also allows you to add projects directly to your local IIS server, to more closely match your production environment. In this bonus post, I'll walkthrough the process of creating a new IIS project.
Note: this article is different from my yet-to-be-published post on converting a File-System based Web Application Project to a Web site Project. This time, we'll use the Sitefinity Project Manager to create a Web Application Project that resides in a Virtual Directory under a running Website defined in IIS. The future article will instead outline the creation of a new Website in IIS at the root level for local testing and development.
Default Web Site
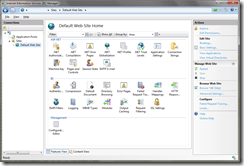
Most of you will likely not need to setup a web site in IIS as most versions of windows will automatically include a Default Website. This site allows you to navigate to http://localhost on your computer to see the following welcome screen:

If you see that image, you're ready to go and can skip ahead to the next section Creating a New Project. Otherwise, you can install IIS using these instructions for Vista/Windows 7 or these for Windows XP.
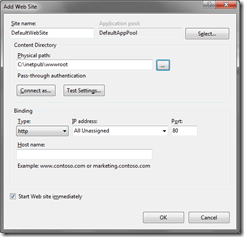
If IIS is installed, but for whatever reason you do not have a running website installed, simply open your IIS Manager (usually found under Control Panel -> Administrative Tools) and right-click the "Sites" node in the TreeView and select "Add Web Site".
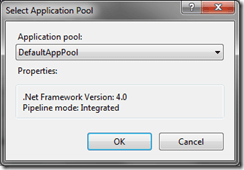
You can name the site as you wish, as well as the path (for the default site I always use c:\inetpub\wwwroot). Since this is the catch all default site, leave all the other settings as default, but be sure assigned Application Pool is set to run ASP.NET 4.0.
Once the site is added, you now have a default website to which new Sitefinity Projects can be added as Virtual Directories.
Creating a New Project
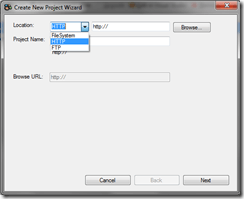
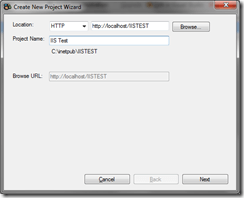
As before, to create a project, simply select the "Create New Project" button from the Sitefinity Project Manager. In the dialog, you can select IIS for the type of the new project.
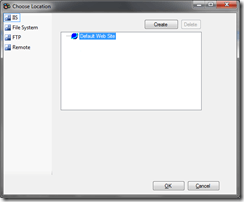
Now select "Browse" to open up a dialog to choose the Location of the project. Select IIS from the left side and you should see a list of your IIS sites on the right. Select the website you wish to add the Sitefinity project to (remember this is going to be added as a virtual directory to the site) then hit "Create" to add the Virtual Directory for your new website.
Make sure all your settings and paths are correct for your IIS Project.
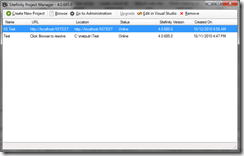
Finally select Next to continue and your new IIS Virtual Directory will be populated with the Sitefinity Blank Project and added to the Project Manager. As with the File System, you can View, Administrate, and Open your project in Visual Studio.
Those Pesky Permissions
The first thing you'll notice when you attempt to browse the site or administration is the "Access to the path ... is denied" error. This is because the IIS Application Pool for your website needs write permissions to the App_Data folder.
Open your website folder in Windows Explorer, then right-click the App_Data folder and select "Properties". In the dialog that opens select the "Security" tab, and then click the "Edit" button in the middle of the window to see permissions for that folder.
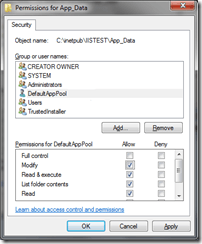
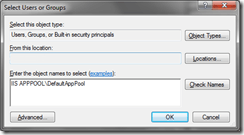
Most likely, you do not have the Application Pool user in this list, so click the "Add" button to open the Users search. You can simply type into the box IIS APPPOOL\[IDENTITY] where [IDENTITY] is the name of the Application Pool that runs your web site. In my case, I'm using the Pool named DefaultAppPool so I entered IIS APPPOOL\DefaultAppPool.
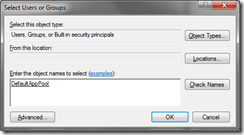
You can verify that you've selected a valid Application Pool by clicking the "Check Names" button. The text you entered should change to an underlined version containing only the name, meaning the user was found:
Click OK and you should now see the Application Pool listed in the App_Data Permissions editor. You can now grant "Modify" access for the folder to the Application Pool User you just added by selecting that user and checking the "Modify" checkbox under "Allow". Click OK to save your changes, and again OK to close the Folder properties.
You should now be able to hit the "Browse" button in the Project Manager and see the "Under Construction" page, as well as the setup instructions for the Administration page.
MORE Pesky Permissions
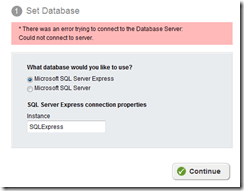
Unfortunately, there is a possibility you might not yet be able to configure your site. When you select the SQL Express database and continue, you might see the following error:
If you're lucky you'll see the full IIS error instead of this generic one. If not it is also visible through the windows Event Viewer available in the Windows Administrative Tools. The error you're probably getting is: Failed to generate a user instance of SQL Server due to a failure in starting the process for the user instance. The connection will be closed.
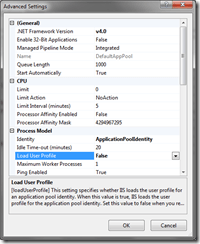
The problem is that the Application Pool needs to be configured to load its user profile. To be honest, I don't know a whole lot about what this means or what this does, but if you want to learn more, there is a great article on Learn.IIS.net about Configuring Application Pool Identities. Now to fix this problem, open up the IIS Manager, select the Application Pool that corresponds to your site, and click "Advanced Settings" from the Actions menu on the right (or from the right-click menu).
Under Process Model change the setting for "Load User Profile" to True, then click OK and restart your website. NOW you should be able to complete the Administration setup and login to your website!
Visual Studio Project
There's one more bit of configuring to do to fully use the IIS Project. As mentioned in my last entry, the Project Manager creates Web Application Projects, which isn't a problem here; IIS websites can handle either project type. The problem is that the Visual Studio Project that is created is, by default, set to use its own Integrated Web Server, meaning that it will launch your site with a random port using that server instead of using IIS.
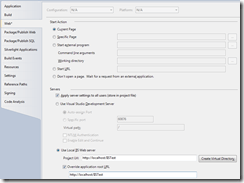
It isn't required that you modify your project to use IIS but since you went through all this trouble to set it up, why not go all the way? To fix this, simply right-click the Project in the Solution Explorer (by default it's SitefinityWebApp) and select "Properties" from the context menu, then select the "Web" tab from the left menu.
From the "Servers" section on the right select the option for "Use Local IIS Web Server". You may also need to modify the Project Url and application root Url to match your IIS virtual directory. Additionally, you can also change the "Start Action" to "Don't open a page" so that you can simply run the debugger, then navigate to whatever page you need to test manually instead of it launching a page automatically.
Please note that this process does NOT convert your IIS Project from a Web Application Project to a Web Site Project (that comes later). It simply tells Visual Studio not to use its own Integrated Web Server to launch your site, but rather to use the existing web site in IIS. This also has the advantage of allowing you to browse your site at any time, without needing to run either the Sitefinity Project Manager or the Visual Studio debugger.
Wrap Up
I'm glad to see that the Sitefinity Project Manager offers this alternative option to the File-System based project. There is a bit of configuring to do, but that is simply a result of how IIS and ASP.NET handle permissions in Windows. So whether you prefer the simplicity of getting up and running immediately, or you want the power of running your local project as a full website, the Sitefinity Project Manager has you covered.

The Progress Team
View all posts from The Progress Team on the Progress blog. Connect with us about all things application development and deployment, data integration and digital business.
Comments
Topics
- Application Development
- Mobility
- Digital Experience
- Company and Community
- Data Platform
- Secure File Transfer
- Infrastructure Management
Sitefinity Training and Certification Now Available.
Let our experts teach you how to use Sitefinity's best-in-class features to deliver compelling digital experiences.
Learn MoreMore From Progress
Latest Stories
in Your Inbox
Subscribe to get all the news, info and tutorials you need to build better business apps and sites
Progress collects the Personal Information set out in our Privacy Policy and the Supplemental Privacy notice for residents of California and other US States and uses it for the purposes stated in that policy.
You can also ask us not to share your Personal Information to third parties here: Do Not Sell or Share My Info
We see that you have already chosen to receive marketing materials from us. If you wish to change this at any time you may do so by clicking here.
Thank you for your continued interest in Progress. Based on either your previous activity on our websites or our ongoing relationship, we will keep you updated on our products, solutions, services, company news and events. If you decide that you want to be removed from our mailing lists at any time, you can change your contact preferences by clicking here.
