Creating Sitefinity 4 Content Modules Part 5: Module Installation
The content you're reading is getting on in years
This post is on the older side and its content may be out of date.
Be sure to visit our blogs homepage for our latest news, updates and information.
Table of Contents
This series covering Sitefinity Content-Based Module creation is broken up into 5 parts:
- Part 1: Project Setup and Hello World
- Part 2: Data Layer
- Part 3: Backend Administration
- Part 4: Frontend Controls
- Part 5: Module Installation
Overview
In the last four posts in this series, we laid the foundation and connected all the plumbing for our module. Now that everything is in place, the only thing left to do is complete the module class, registering and initializing the module and its associated controls and pages.
This is done by filling in the methods we created in part 1, and we'll take a look at each method and what it does separately. Once again, the completed project will be available for download (and the complete solution including a sample website) will be distributed in the Sitefinity SDK.
Initialize
This method registers both the module configuration (LocationsConfig) as well as the backend web service we defined in part 3. Update it with the following code.
/// Initializes the service with specified settings.
/// </summary>
/// <param name="settings">The settings.</param>
public override void Initialize(ModuleSettings settings)
{
    base.Initialize(settings);

    // initialize configuration file
    Config.RegisterSection<LocationsConfig>();

    // register web services
    ObjectFactory.RegisterWebService(typeof(LocationsBackendService), "Sitefinity/Services/Content/Locations.svc");
}
Install
This method simply adds the Locations Module to the list of Sitefinity Modules.
/// <summary>
/// Installs this module in Sitefinity system for the first time.
/// </summary>
/// <param name="initializer">The Site Initializer. A helper class for installing Sitefinity modules.</param>
public override void Install(SiteInitializer initializer)
{
    base.Install(initializer);

    // register module ?
    IModule locationsModule;
    SystemManager.ApplicationModules.TryGetValue(LocationsModule.ModuleName, out locationsModule);

    initializer.Context.SaveMetaData(true);
}
InstallPages
This is the key to module installation. As we saw in part 1, this method is where the actual module installation takes place, creating the backend pages and registering the backend administration we created in part 3. Refer to part 1 for a detailed walkthrough the method then update the method with this code.
/// <summary>
/// Installs the pages.
/// </summary>
/// <param name="initializer">The initializer.</param>
protected override void InstallPages(SiteInitializer initializer)
{
    // code to install admin page nodes and pages
    // get pagemanager
    var pageManager = initializer.PageManager;
    var modulesPageNode = pageManager.GetPageNode(SiteInitializer.ModulesNodeId);

    // Create PageNode if doesn't exist
    var locationsModulePageGroupNode = pageManager.GetPageNodes().Where(t => t.Id == LocationsPageGroupID).SingleOrDefault();
    if (locationsModulePageGroupNode == null)
    {
        // create page node under Modules node
        locationsModulePageGroupNode = initializer.CreatePageNode(LocationsPageGroupID, modulesPageNode, Telerik.Sitefinity.Pages.Model.NodeType.Group);
        locationsModulePageGroupNode.Name = LocationsModule.ModuleName;
        locationsModulePageGroupNode.ShowInNavigation = true;
        locationsModulePageGroupNode.Attributes["ModuleName"] = LocationsModule.ModuleName;

        // hard-code names for now, will eventually be localized
        locationsModulePageGroupNode.Title = "Locations";
        locationsModulePageGroupNode.UrlName = "Locations";
        locationsModulePageGroupNode.Description = "Module for managing a list of Locations";
    }

    // create Landing Page if doesn't exist
    var landingPage = pageManager.GetPageNodes().SingleOrDefault(p => p.Id == LandingPageId);
    if (landingPage == null)
    {
        // create page
        var pageInfo = new PageDataElement()
        {
            PageId = LandingPageId,
            IncludeScriptManager = true,
            ShowInNavigation = false,
            EnableViewState = false,
            TemplateName = SiteInitializer.BackendTemplateName,

            // hard-code names for now, will eventually be localized
            Name = LocationsModule.ModuleName,
            MenuName = "Locations Module",
            UrlName = "Locations",
            Description = "Landing page for the Locations Module",
            HtmlTitle = "Locations Module"
        };

        pageInfo.Parameters["ModuleName"] = LocationsModule.ModuleName;

        // create control panel
        var backendView = new BackendContentView()
        {
            ModuleName = LocationsModule.ModuleName,
            ControlDefinitionName = LocationsDefinitions.BackendDefinitionName
        };

        // add page
        initializer.CreatePageFromConfiguration(pageInfo, locationsModulePageGroupNode, backendView);
    }
}
Upgrade
This method is not used, as we are not performing any upgrades to the module. You can leave it blank for now.
InstallTaxonomies
Here we simply register our LocationItem type into the Sitefinity taxonomy system. Use the following code.
/// <summary>
/// Registers the module data item type into the taxnomy system
/// </summary>
/// <param name="initializer">The initializer.</param>
protected override void InstallTaxonomies(SiteInitializer initializer)
{
    this.InstallTaxonomy(initializer, typeof(LocationItem));
}
GetModuleConfig
This is simply a helper method to simplify retrieval of the module configuration.
/// <summary>
/// Gets the module config.
/// </summary>
/// <returns></returns>
protected override ConfigSection GetModuleConfig()
{
    // code to return Module configuration
    return Config.Get<LocationsConfig>();
}
InstallConfiguration
The other major component of any module is the frontend public controls. This method registers the LocationsView control in the Toolbox so users can drag and drop it onto a page.
/// <summary>
/// Installs module's toolbox configuration.
/// </summary>
/// <param name="initializer">The initializer.</param>
protected override void InstallConfiguration(SiteInitializer initializer)
{
    // get section from toolbox
    var config = initializer.Context.GetConfig<ToolboxesConfig>();
    var pageControls = config.Toolboxes["PageControls"];
    var section = pageControls
        .Sections
        .Where<ToolboxSection>(e => e.Name == ToolboxesConfig.ContentToolboxSectionName)
        .FirstOrDefault();

    // create it if it doesn't exist
    if (section == null)
    {
        section = new ToolboxSection(pageControls.Sections)
        {
            Name = ToolboxesConfig.ContentToolboxSectionName,
            Title = "ContentToolboxSectionTitle",
            Description = "ContentToolboxSectionDescription",
            ResourceClassId = typeof(PageResources).Name
        };
        pageControls.Sections.Add(section);
    }

    // add locations view if it doesn't exist
    if (!section.Tools.Any<ToolboxItem>(e => e.Name == "LocationsView"))
    {
        var tool = new ToolboxItem(section.Tools)
        {
            Name = "LocationsView",
            Title = "Locations View",
            Description = "Public control from the Locations module",
            CssClass = "sfLocationsViewIcn",
            ControlType = typeof(LocationsView).AssemblyQualifiedName
        };
        section.Tools.Add(tool);
    }
}
Public Properties and Constants
Finally, we have a few properties to override, namely the LandingPageId (backed by a private constant) and the Managers, which retrieves the Content Manager for the module. Finish out the module class with the following code.
 #region Public Properties

        /// <summary>
        /// Gets the landing page id for each module inherit from <see cref="T:Telerik.Sitefinity.Services.SecuredModuleBase"/> class.
        /// </summary>
        /// <value>
        /// The landing page id.
        /// </value>
        public override Guid LandingPageId
        {
            get { return LocationsModuleLandingPage; }
        }

        public override Type[] Managers
        {
            get { return new[] { typeof(LocationsManager) }; }
        }

        #endregion


        #region Constants

        /// <summary>
        /// The name of the Locations Module
        /// </summary>
        public const string ModuleName = "Locations";

        // Page IDs
        public static readonly Guid LocationsPageGroupID = new Guid("000262BF-E8EA-4BE3-8C67-E1C2486A57BE");
        public static readonly Guid LocationsModuleLandingPage = new Guid("7A0F43CE-064A-4E09-A3B9-59CA2E1640A6");

        #endregion
Virtual Path Provider Registration
Recall that in the previous step on building the frontend controls for our module, we set a path to their templates using the Virtual Path Provider.
In order for our module to be able to load these virtual paths, they need to be registered during module installation. Otherwise you will get see “error parsing the template” when you add the public control to a page.
Add the following method to the LocationsModule class:
private void InstallCustomVirtualPaths(SiteInitializer initializer)
{
    var virtualPathConfig = initializer.Context.GetConfig<VirtualPathSettingsConfig>();
    ConfigManager.Executed += new EventHandler<ExecutedEventArgs>(ConfigManager_Executed);
    var locationsModuleVirtualPathConfig = new VirtualPathElement(virtualPathConfig.VirtualPaths)
    {
        VirtualPath = "~/LocationTemplates/*",
        ResolverName = "EmbeddedResourceResolver",
        ResourceLocation = "LocationsModule"
    };
    if (!virtualPathConfig.VirtualPaths.ContainsKey("~/LocationTemplates/*"))
        virtualPathConfig.VirtualPaths.Add(locationsModuleVirtualPathConfig);
}
Then simply call the method from the Install method of the module:
public override void Install(SiteInitializer initializer)
{
    base.Install(initializer);

    // register module ?
    IModule locationsModule;
    SystemManager.ApplicationModules.TryGetValue(LocationsModule.ModuleName, out locationsModule);

    initializer.Context.SaveMetaData(true);
    this.InstallCustomVirtualPaths(initializer);
}
Installation
We covered module installation in the "Hello, World" example from part 1 of this series, so here is a summary of the required steps.
- Login to the Sitefinity backend
- Navigate to Administration > Settings > Advanced Settings
- Expand System > ApplicationModules node
- Click "Create New"
- Add module details; Leave Version blank; Set Startup type to "OnApplicationStart"
- Save Changes
- Restart your website by saving your site web.config file
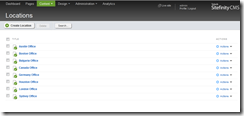
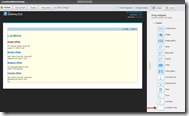
Once you've completed installation, you can now go to the Locations module page in the backend, as well as drop the LocationsView onto a Sitefinity page.
With that, the module is complete! The completed module is available for download below, and will also be available in the Q2 release of the SDK.
What's Next
We've now built and installed a complete Sitefinity Content-Based Module. It has all the BASIC components in place, but there is still much more we can do to make our module more complete.
This will be explored further in a continuing series of follow-up Advanced Topic posts, covering everything from adding control designers to the LocationsView control to supporting security, content lifecycle and workflow.
Be sure to share your experience with this module in our Sitefinity 4 SDK Discussion Forum as well as any comments, questions, or suggestions for future posts on module creation.
Downloads

The Progress Team
View all posts from The Progress Team on the Progress blog. Connect with us about all things application development and deployment, data integration and digital business.
Comments
Topics
- Application Development
- Mobility
- Digital Experience
- Company and Community
- Data Platform
- Secure File Transfer
- Infrastructure Management
Sitefinity Training and Certification Now Available.
Let our experts teach you how to use Sitefinity's best-in-class features to deliver compelling digital experiences.
Learn MoreMore From Progress
Latest Stories
in Your Inbox
Subscribe to get all the news, info and tutorials you need to build better business apps and sites
Progress collects the Personal Information set out in our Privacy Policy and the Supplemental Privacy notice for residents of California and other US States and uses it for the purposes stated in that policy.
You can also ask us not to share your Personal Information to third parties here: Do Not Sell or Share My Info
We see that you have already chosen to receive marketing materials from us. If you wish to change this at any time you may do so by clicking here.
Thank you for your continued interest in Progress. Based on either your previous activity on our websites or our ongoing relationship, we will keep you updated on our products, solutions, services, company news and events. If you decide that you want to be removed from our mailing lists at any time, you can change your contact preferences by clicking here.


