Converting Sitefinity 4 Beta Web Application Projects to Web Site Projects
The content you're reading is getting on in years
This post is on the older side and its content may be out of date.
Be sure to visit our blogs homepage for our latest news, updates and information.
Today we talk about the Web Application Projects created by the new Sitefinity Project Manager, and how you can (if you wish) convert them to Web Site Projects.
This is another bonus post from my series comparing Sitefinity 3.x to the new Sitefinity Beta (Beta 2 as of this writing). It’s not a direct comparison of Sitefinity 3.x and 4 like the other posts in the series, but I felt it might be relevant and helpful to 3.x developers who may be used to doing things this way. It also shows just how flexible Sitefinity is, always allowing you to be in control of your environment.
Note: Although the official release of Sitefinity 4.0 should offer you the developer a choice of project type on setup, this article should still prove helpful if you want to create your website at the root of your local server, instead of a Virtual Directory. Read on to learn more.
The Debate
If you want to kill about 20 minutes of productivity in your web dev room, ask the question "Which do you prefer: Web Applications or Web Sites?" There will be a lot of back and forth and it is likely to quickly escalate, so it's best to ask this question right before lunch so you have a cutoff point.
It's also the subject of numerous blog posts and forum discussions:
- ASP.NET: Web Site versus Web Application Project
- Web Sites vs Web Applications
- Web Application Project Vs Web Site
- Web application project or Web site project which is "better"?
- Web Site vs. Web Application Project
- and many, many more...
Each option has its merits, and it is not my intention to convince you to use one method over the other. If you prefer to use Web Application Projects and do not mind working from a Virtual Directory (instead of the server root), you can skip this entire post, as by default, the Sitefinity Project Manager creates new websites using that model.
If, however, you prefer to work with a website, read on!
The Setup
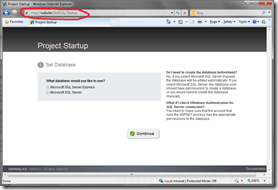
Start by creating a new file-system based Sitefinity Website using the Sitefinity Project Manager. Here, I have created a new site called Website and placed it at the location c:\inetpub\Website. Don't Browse or Administer the site, we're going to do that after we're done setting up the website.
The Goal
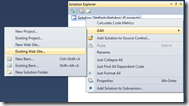
Converting a Web Application Project to a Web Site Project is actually very simple. Open Visual Studio, then go to File -> Open Web Site and select the project folder from the File System. Save this project in a new solution and you are done. The web site will run using Visual Studio's Integrated Web Server and you're good to go.
However, the goal here is to go a little further and create a local version of the website that lives at the root of the server, instead of a Virtual Directory. By default, the Project Manager will create a new website as http://localhost/Website. We want to change it so that the URL to access your local test site would be simply http://Website/ so that your development environment matches your live website as much as possible.
IIS
Running a local version of your website requires that you have IIS installed and configured on your machine. If needed, take a look at these installation guides for Windows Vista / 7 and Windows XP.
Windows XP
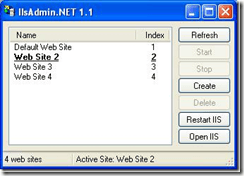
Speaking of Windows XP (you're not still USING it are you?!), there is a limitation in this OS that prevents you from adding and running more than one website at a time. While you could certainly leave this alone, switching properties for this single website as needed, a better solution is available called IIS Admin.
This tool allows you to create multiple websites in Windows XP, though only one of them can run at a time. The rest of this article will be using IIS 7 for its screenshots and walkthrough, but you should easily be able to translate most of this to work with XP.
Adding a New Website
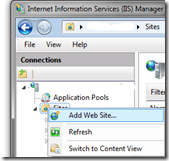
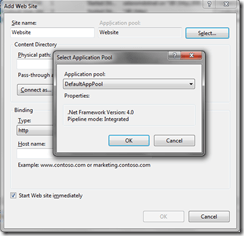
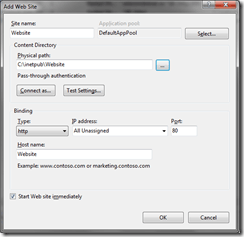
Open up the IIs Manager and select the Sites node in the tree then "Add Web Site". Give your site a name and make sure that the selected Application Pool is running ASP.NET 4.0 (see my last post on using IIS with Sitefinity for more about the Application Pool including how to fix permission errors you'll likely encounter).
Set the Physical Path for the website to be the directory created by your Sitefinity Installation, in my case c:\inetpub\Website.
Hostnames
Although you can run multiple websites on your local server, you usually only have a single IP address to which a site can be bound. This limitation is overcome using hostnames. By assigning a hostname to your website, you can navigate to it using that hostname instead of the IP (or using localhost). For example, in the website above, my hostname is Website, so to access that site on my computer I would simply navigate to http://Website in my browser.
Hosts File
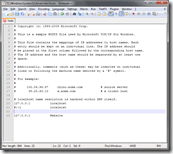
There is one additional step required for this to work. You must edit your local hosts file, which is a text document that is usually located in the following folder: c:\windows\system32\drivers\etc\hosts. Open the file in a text editor and add the following line at the bottom, replacing "Website" with the hostname you've chosen for your website.
127.0.0.1 Website
Save and close the file and you should be able to visit this hostname in your browser and see your site. In my case I can browse my site by going to http://Website and I can administer the site by going to http://Website/Sitefinity. Note that the link to Browse and Administer your website from the Project Manager should still work, but it will launch the Integrated Web Server instead of using your new hostname.
Permissions and Visual Studio
I covered most of what you need to know about permissions in my previous article on configuring a Sitefinity website in IIS. There is also a section on modifying the existing Visual Studio Project so that it uses IIS instead of the default integrated webserver.
In addition, you can always open Visual Studio and select "Open Web Site", choosing your website from IIS so that it auto-configures the project to run as a website. However, be aware that this creates a new project, and will likely break the connection between the "Edit in Visual Studio" button in the Sitefinity Project Manager and your project.
An alternative would be to open from the Project Manger, then remove the File-System project, and add the existing website to the solution.
Wrap Up
This article is mainly an issue of preference. Most team developers or those doing more than just VERY basic sites might likely still prefer the structure and discipline provided by a Web Application Project.
However, if you are like me, and prefer to work in the paradigm of the traditional Web Site, this article shows you just how flexible Sitefinity is, ultimately always letting YOU decide what is best and what works for you.

The Progress Team
View all posts from The Progress Team on the Progress blog. Connect with us about all things application development and deployment, data integration and digital business.
Comments
Topics
- Application Development
- Mobility
- Digital Experience
- Company and Community
- Data Platform
- Secure File Transfer
- Infrastructure Management
Sitefinity Training and Certification Now Available.
Let our experts teach you how to use Sitefinity's best-in-class features to deliver compelling digital experiences.
Learn MoreMore From Progress
Latest Stories
in Your Inbox
Subscribe to get all the news, info and tutorials you need to build better business apps and sites
Progress collects the Personal Information set out in our Privacy Policy and the Supplemental Privacy notice for residents of California and other US States and uses it for the purposes stated in that policy.
You can also ask us not to share your Personal Information to third parties here: Do Not Sell or Share My Info
We see that you have already chosen to receive marketing materials from us. If you wish to change this at any time you may do so by clicking here.
Thank you for your continued interest in Progress. Based on either your previous activity on our websites or our ongoing relationship, we will keep you updated on our products, solutions, services, company news and events. If you decide that you want to be removed from our mailing lists at any time, you can change your contact preferences by clicking here.


