Sitefinity 4 Network Load Balancing
The content you're reading is getting on in years
This post is on the older side and its content may be out of date.
Be sure to visit our blogs homepage for our latest news, updates and information.
One of the key elements of the Sitefinity 4 SP1 release is updated support for running Sitefinity in a network load-balanced environment. Today we'll take a brief look at the supported scenarios and how they are setup.
Supported Environments
Sitefinity has been tested using Network Load Balancing (NLB) available on Windows Server 2008 and Windows Server 2008 R2.
In addition, Sitefinity can be configured to work with the new Web Farm Framework 2.0.
Read on for a brief overview of the different scenarios. This post will be updated with links to the documentation as it is completed by the team.
Option 1: Windows Server Network Load Balancing
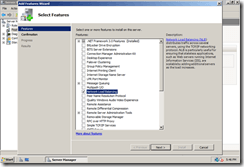
The Server Manager in Windows Server 2008 has on option to enable Network Load Balancing. Simply select “Features” from the left panel the “Add Features” on the right to step through a setup wizard.
This process must be completed for every server that will be part of the NLB cluster. After this is completed, run the NLB tool by clicking Start > Administrative Tools > Network Load Balancing Manager.
Add Cluster
Before you can create a new cluster, ensure that all of the Network Interface Cards (NIC) in your servers have static IP addresses.
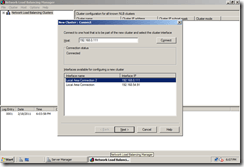
From the Cluster Menu select the option for New, bringing up the New Cluster : Connect dialog. Enter the name or IP address of the server to be added to the cluster and click Connect. This will reveal the network interfaces available for NLB.
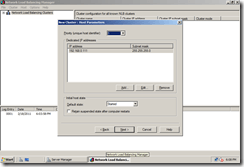
Select the interface you will be using and continue to configure the host parameters, including setting the host priority and dedicated IP addresses for the host.
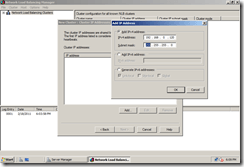
Continuing to the next screen, configure the cluster IP address and add it to the list.
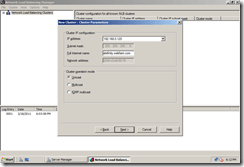
On the next screen (Cluster Parameters) specify the full internet address that will be used to access this cluster. You must also specify the operation mode for your cluster.
Select Unicast if every host of your cluster has a designated network adapter for NLB, so that all servers share the MAC address of the host.
Select Multicast if every host of your cluster has a single network adapter, so that every server keeps its own address while in the cluster.
Additional information about cluster operation modes is available in the Network Load Balancing Technical Overview from Microsoft.
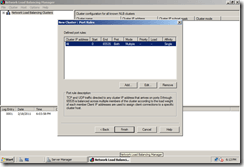
Continue on the the Port Rules screen, where you can set what rules are applied for specific ports in the cluster.
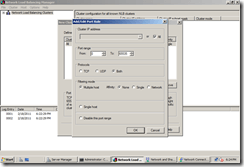
Because Sitefinity does not utilize the session state, make sure to set the filtering mode to Multiple host with an Affinity of none.
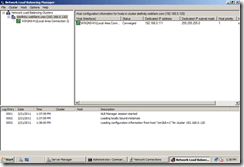
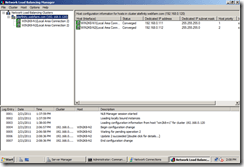
Finish the wizard and you should now see your new cluster in the tree on the left.
Add Hosts to the Cluster
Now that you have created your first cluster, you need to add nodes to it so that the network load can be shared. Simply right click the cluster and select the option to Add Host to Cluster.
Follow the same steps above for the new host and it will be added to the list of hosts in the tree view.
Once you’ve completed setting up your cluster, skip down to “Configuring Sitefinity for Load Balancing”.
Option 2: Web Farm Framework
To setup a web farm you must have a controller server that will host the web farm and servers that will be connected in a web farm, and every server in that farm must have the Web Farm Framework installed.
In addition, every server must have one of the following:
- A local administrator account with the same name and password as an administrator account on each computer that will participate in the server farm.
- A domain account in the local Administrators group that is also in the local Administrators group on each computer that will participate in the server farm.
For a complete list of system requirements read the article System and Platform Requirements for the Web Farm Framework 2.0 for IIS 7.
Create a Web Farm
On the controller server, open IIS (Start > Administrative Tools > Internet Information Services) and right click the Server Farms node in the tree view, selecting the option for Create Server Farm, bringing up the setup wizard.
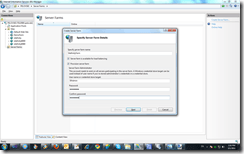
Name your server farm and leave the options checked for Server Farm is available for Load Balancing and Provision server farm. Finally, enter the credentials for the user that is available on all servers (as mentioned above).
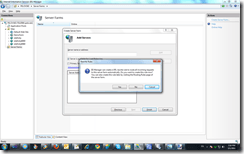
In the next Add Servers screen, do not add any servers, but instead click Finish. A dialog will prompt you to create a default rewrite rule. Select Yes to continue.
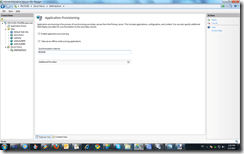
Your server farm is now available in the tree view on the left. Select it then open the item "Application Provisioning” on the right.
Sitefinity does not and should not use Application provisioning, so uncheck all of the boxes and set the Synchronization Interval to 00:00:00.
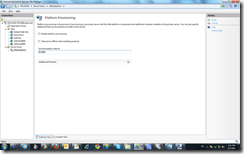
Perform the same task for the Platform Provisioning item for your server farm.
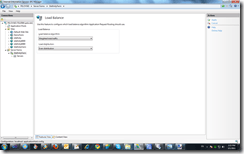
Finally, open the Server Farms item for your server farm and set the Load Balance Algorithm to Weighted total traffic and the Load distribution to Event Distribution.
Add Servers to the Farm
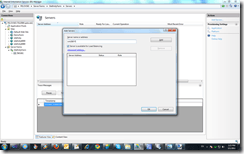
Underneath your server farm in the tree view right-click the Servers node and select Add Servers to bring up the dialog prompt. Enter the name for your server and ensure that the Server is available for Load Balancing is checked
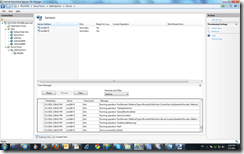
Repeat this for each server you wish to add to your farm. Because application and platform provisioning are disabled for Sitefinity, all of your servers will be set to the Secondary role.
Configure Sitefinity for Load Balancing
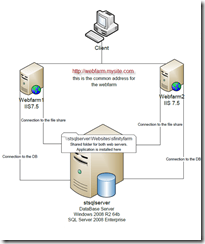
Install Sitefinity to the central location from which each front end server in the cluster will access Sitefinity. This should be a network share available to all servers.
Create the websites on each of the front end webservers, however make sure that each one of them points to this network share as well as the database server that hosts the shared Sitefinity database. Here is a high-level diagram that visualizes this setup.
Important Note: One additional requirement is that the Sitefinity website in each of the front-end servers be accessible directly within each of the other servers. For example, say you setup http://farm1.mysite.com on Server1 and http://farm2.mysite.com on Server2. Then Server1 should be able to access the website on Server and vice-versa.
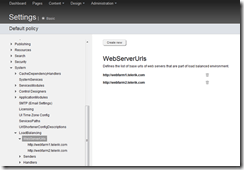
At this point, Sitefinity is ready for load balancing. Navigate to Sitefinity > Administration > Settings > Advanced Settings > System > Load > Balancing > WebServerUrls and add the urls for each of your front end servers as shown in this example.
Additional Resources
Network Load Balancing
- Network Load Balancing Overview
- Installing Network Load Balancing
- Create a New Network Load Balancing Cluster
- Network Load Balancing Manager Properties
Web Farm Framework
- Microsoft Web Farm Framework 2.0 for IIS 7
- System and Platform Requirements for the Web Farm Framework 2.0 for IIS 7
- Setting up a Server Farm with the Web Farm Framework 2.0 for IIS 7
Feedback
Documentation continues to grow and evolve for this topic, and we want to hear your feedback. Drop by our Sitefinity discussion forums and share your experiences, questions, and comments.

The Progress Team
View all posts from The Progress Team on the Progress blog. Connect with us about all things application development and deployment, data integration and digital business.
Next:
Comments
Topics
- Application Development
- Mobility
- Digital Experience
- Company and Community
- Data Platform
- Secure File Transfer
- Infrastructure Management
Sitefinity Training and Certification Now Available.
Let our experts teach you how to use Sitefinity's best-in-class features to deliver compelling digital experiences.
Learn MoreMore From Progress
Latest Stories
in Your Inbox
Subscribe to get all the news, info and tutorials you need to build better business apps and sites
Progress collects the Personal Information set out in our Privacy Policy and the Supplemental Privacy notice for residents of California and other US States and uses it for the purposes stated in that policy.
You can also ask us not to share your Personal Information to third parties here: Do Not Sell or Share My Info
We see that you have already chosen to receive marketing materials from us. If you wish to change this at any time you may do so by clicking here.
Thank you for your continued interest in Progress. Based on either your previous activity on our websites or our ongoing relationship, we will keep you updated on our products, solutions, services, company news and events. If you decide that you want to be removed from our mailing lists at any time, you can change your contact preferences by clicking here.
