Migrating Sitefinity 3 to 4 Deep Dive: Preparation
The content you're reading is getting on in years
This post is on the older side and its content may be out of date.
Be sure to visit our blogs homepage for our latest news, updates and information.
As you know, Sitefinity is dedicated to bringing the benefits and improvements available in Sitefinity 4 to all our customers. The latest internal build and upcoming releases represent a year’s worth of enhancements to the Migration Module to improve this experience.
As part of that effort, I am preparing new resources to aid customers who are migrating based on real-world user feedback. Where the Migration Guide and migration webinar are meant to introduce you to migration and help you get started, the next few blog posts are more of a “What’s Next” resource, describing common scenarios, issues, and errors you might encounter along the way.
To get things started, however, today we’ll be taking a detailed, step-by-step look at best practices to help you achieve a smooth start to migration. The next post will look at common error messages you may encounter along the way.
1. Run Sitefinity 3 Locally
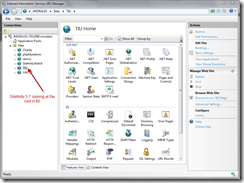
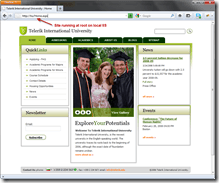
It is highly recommended that you run the Sitefinity 3 site from which you will be importing content locally. This should be run as a standalone website in IIS.
Do not run the website in a Virtual Directory, and do not use the Visual Studio web server. Sitefinity 3 should run as a root website in IIS.
2. Update Sitefinity 3 to Latest Version
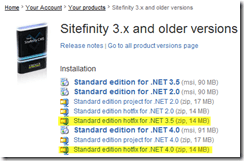
The site to be migrated must be running Sitefinity 3.7 SP4 (build 3.7.2136). Both the Standard and Community Editions are supported.
In addition, the site must be running on either ASP.NET 3.5 or ASP.NET 4.0.
Migrating from a website running ASP.NET 2.0 is not supported.
A future post will look at common error encountered during migration, including those resulting from upgrading to the latest version of Sitefinity 3. I will link to that post here when it is ready.
In the meantime, here are several resources you might find helpful in patching your Sitefinity website.
- Installation Guide for Sitefinity 3.x – For installing your Sitefinity website in IIS
- Sitefinity 3 Upgrade Instructions – Patching a Sitefinity Site
- Sitefinity 3.7 SP4 Release Notes
- Upgrading to Sitefinity 3.7 SP4 – Video walkthrough, also updates from ASP.NET 2.0 to 4.0
How to Tell Which Version of Sitefinity You Are Running
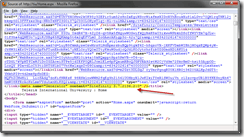
One of the questions asked in the webinar was how to tell which version of Sitefinity 3 a website is running. You can do this two ways:
View the HTML source of our Sitefinity 3 website. Look for a meta property named Generator. The content of this property contains the build number of Sitefinity.
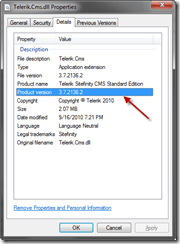
Alternatively, you can open the bin folder of the Sitefinity 3 site, then check the properties of one of the Sitefinity DLL files (such as Telerik.Cms.dll). The Details Tab should show the build number under Product Version.
3. Install Migration Web Service
Sitefinity migration works by first installing a Migration Web Service in your Sitefinity 3 website, then calling that web service from the Sitefinity 4 Migration Module.
You have two options for installing the web service in Sitefinity 3.
Automatic Installation
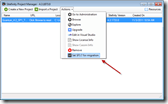
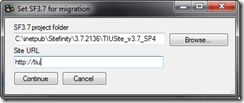
Automatic installation is available using the Sitefinity 4 Project Manager. Simply point the Project Manager to the working folder of your Sitefinity site and specify the local url (again, running in IIS) to the website.
This installs the migration service dll binaries, adds the migration service file, and modifies the web.config file to register the service. You may need to set permissions in your Sitefinity 3 folder to allow the Project Manager write-access.
If you encounter any issues using the automatic installer, you can try the manual installation.
Manual Installation
This requires performing the steps of the Project Manager above manually. Detailed instructions for this are available in the Sitefinity Documentation: Manual Migration Setup.
Test Migration Service
Once you have completed installation, you can test that the migration service was installed by navigating to the path ~/MigrationService.svc. For example if your local Sitefinity 3 website url is http://localhost, the path to the migration service would be http://localhost/MigrationService.svc.
The migration service is secured, which means if everything is setup correctly, you should see this (and only this) exception:
Exception Type: Telerik.Sitefinity.Migration.MigrationServiceException
Message: Authentication failed.
If you encounter any other error message, check the Sitefinity 3 error log, located at ~/App_Data/error.log.
4. Create a New Sitefinity 4 Website
It is highly recommended that you import your content into a new Sitefinity 4 site. This not only prevents any possible conflicts from existing content, but also makes your project easily resettable if you need to run the migration tool again.
For more details on creating a fresh Sitefinity 4 site, see the official documentation: Create a New Sitefinity 4 Project.
IMPORTANT NOTE: Do Not Use the Project Manager Web Server
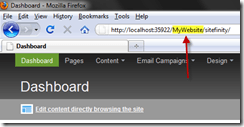
Although the Sitefinity 4 Project Manager has an internal web server, it runs your website as a virtual directory folder instead of at the root.
This will cause issues when you migrate content, since it will append this directory to the urls. When you deploy the finished website to your live server, this extra folder path will result in broken links.
Instead, use either the Visual Studio browser or IIS. By default, both of these will run your site at the root so there are no extraneous paths added to your content urls.
Optional Step: Modify Images Library Settings
By default, the Sitefinity 4 Images library uses the ~/images/ path for its content. This means that any urls that begin with ~/images are expected to be served from the Images library.
If you are using a physical folder called images, you will encounter a 404 error when viewing them (as outlined in this KB article), since they are in the file system, and not the image library.
Fortunately you have three options to resolve this issue.
1. Rename your physical images folder. This is only recommended in the simplest of scenarios, because if you have content (such as blog posts, news items, etc) that reference these paths, you will need to manually update them to the new folder.
2. Rename the library default path. You can change the default path from “images” to something like “sf-images” so that there is no longer any conflict. However, it is important that you make this change before importing content so that the paths to these library images can be correctly updated in content items such as news, blogs, etc.
Instructions on changing this path are available in this KB article: Static Files are not served from Images or Videos folders.
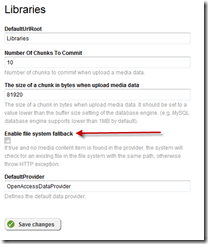
3. Enable File-System Fallback. This is by far the simplest and most recommended option. It tells Sitefinity that if an image is not found in the Library, to fall back to the file system and serve it from there. However, there is a slight performance overhead when selecting this option, since each file-system request must first check to see if it exists in the library.
5. Copy All Static Files from Sitefinity 3
The migration module only imports the actual content from the database; the underlying static files (such as master pages, images and documents in the file system, scripts, etc) need to by copied manually.
Simply copy them from the Sitefinity 3 folder and paste them in the same relative location in the Sitefinity 4 folder.
Do not copy the App_Data or Sitefinity folders, as these are incompatible with Sitefinity 4.
Additionally, if you are using the App_Code folder for dynamic, custom code, this is also incompatible, as Sitefinity 4 uses Web Application Projects. Sitefinity 3 by default is a Web Site Project. You will need to re-add this code to Sitefinity 4 manually.
5. Run Migration, Recommended Sequence
At this point, you are ready to run the Migration Module and import your content. It is recommended that you run the tool importing all content at once, allowing the migration to handle the sequence of import.
However, if you encounter issues, you can also run the migration in phases. However, because of dependencies among content, it is recommended that you run it in this sequence:
- Users and Roles
- All Content Items (Libraries, News, etc)
- Themes
- Templates
- Pages
Be sure to import pages last, as they require all related content (underlying template, links to images in the library, etc) to be in place before they are migrated.
If you encounter any issues at this point, check the Migration Log for exceptions and share them in our Migrating from 3.x to 4.x discussion forum.
Optional: Handling Multiple Providers
The current version of the Migration Module imports ALL content from ALL providers at once. Although a future build will address this issue, you can currently workaround this problem.
Create matching providers in the Sitefinity 4 website. Then run the migration tool once for each provider, enabling ONLY that provider in Sitefinity 3. Be sure to select the correct provider in the drop-down menu that corresponds to the one from which you are importing.
We are still improving this story, so if you are using multiple providers, please share your experiences with us.
What’s Next
Now that we’ve taken a detailed look at Migration preparation, we’ll next focus on common error messages you may encounter. This includes both during preparation, during migration, and after migration is complete.
Until then, I encourage you to grab the latest build of Sitefinity 4, which has massive improvements to the migration story. Try the migration yourself and share your experience with us so that we can continue to improve and enhance this tool.

The Progress Team
View all posts from The Progress Team on the Progress blog. Connect with us about all things application development and deployment, data integration and digital business.
Comments
Topics
- Application Development
- Mobility
- Digital Experience
- Company and Community
- Data Platform
- Secure File Transfer
- Infrastructure Management
Sitefinity Training and Certification Now Available.
Let our experts teach you how to use Sitefinity's best-in-class features to deliver compelling digital experiences.
Learn MoreMore From Progress
Latest Stories
in Your Inbox
Subscribe to get all the news, info and tutorials you need to build better business apps and sites
Progress collects the Personal Information set out in our Privacy Policy and the Supplemental Privacy notice for residents of California and other US States and uses it for the purposes stated in that policy.
You can also ask us not to share your Personal Information to third parties here: Do Not Sell or Share My Info
We see that you have already chosen to receive marketing materials from us. If you wish to change this at any time you may do so by clicking here.
Thank you for your continued interest in Progress. Based on either your previous activity on our websites or our ongoing relationship, we will keep you updated on our products, solutions, services, company news and events. If you decide that you want to be removed from our mailing lists at any time, you can change your contact preferences by clicking here.
