Sitefinity Ecommerce – Combining widgets together on a widget template
The content you're reading is getting on in years
This post is on the older side and its content may be out of date.
Be sure to visit our blogs homepage for our latest news, updates and information.
One of the great features of Sitefinity is most of the user widgets (widgets are dragged-dropped onto pages) come with a default template that you can modify and customize. This is a very powerful feature of Sitefinity as it allows you to change the look and feel of the template, but more importantly it allows you to enhance the functionality of the widget. In this post, I would like to show you how to modify the Sitefinity Product List widget template by adding a simple “Add To Cart” button on a product listing page.
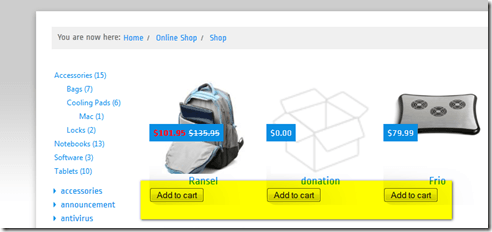
My new product list template will display multiple products on a product list page along with an add to cart button. The add to cart button is actually the Sitefinity Buy Now widget. Just like the Buy Now widget, a visitor can add a product directly to the shopping cart then be directed automatically to the checkout page; bypassing the shopping cart altogether.
Code Example
Below is the source code that I will use for this new product list template.
CustomProductMasterView.ascx
https://gist.github.com/2363216
CustomBuyNowView.ascx
https://gist.github.com/2363250
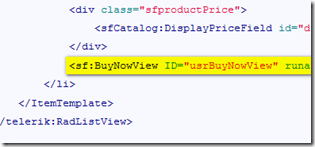
Near the bottom of the CustomProductMasterView.ascx file, you will see a line whereby I add in the “Buy Now” view.
This line is what defines where the “add to cart” button will be placed. The buy now widget works by adding a product to the shopping cart and automatically directing the user to the check out page. If the product has an option, then the buy now widget directs the visitor to the product detail page. Thus the buy now view shown above requires the page identifiers for two pages, the product list and checkout page.
To get these page identifiers, open your Sitefinity database, look for a table called sf_page_node, open this table and select the ID for the page which has the product list on it. In my example, I am using a page called “shop” which has the product list widget on it. You will need to also find the checkout page, and get the page identifier for this page as well.
I could have made a slick and easy JavaScript pop-up window asking to select the product list and check out page, but this requires additional steps and more code, and since this page may never be changed, then editing the DB and selecting the page ID number is actually much easier than creating a JavaScript pop-up window.(Plus it shows you how to link of pages using page ID’s.) However, if the productlist or checkout page is ever deleted, and/or a new product list or checkout page is created, you will need to modify these values in the template accordingly. There are several columns with identifiers in them, thus make sure to use the identifier that is in the column named “ID”.
The last step is to copy the CustomByNowView.ascx file shown above, to a particular folder in your web site and modify the template path accordingly.
Now that you have the template created, lets add it to Sitefinity and link the product list widget to it.
Creating a new widget template in Sitefinity
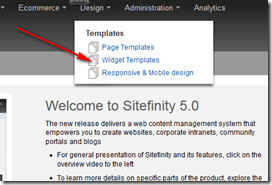
To begin, login to the backend of Sitefinity and click on “Design” in the main navigation, then select “Widget Templates” and create a new widget template. In the drop down, select the widget you want to create a new template for. I selected the “product list” template.
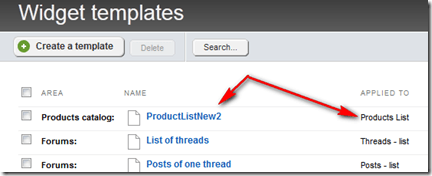
You can modify the product list default template called “Products catalog”.
If you make a mistake, you can easily reset the template back to its default. However best practices are to copy the contents of the default template and paste them into a new template. Changing live templates could cause problems for a live production site.
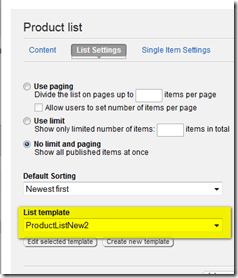
To use the new template, edit the page in Sitefinity which has the product list widget on it and edit the properties of the product list widget. Select the new template which you created above. I called my new template productlist2.
Apply the changes to the widget and publish the page. Go to your product list page and you should now see an “add to cart” button for each product. You may want to create a temporary productlist page, whereby you can add the new template and demo the design to the merchant before publishing to a production site.
I hope this post has given you a stronger understanding of working with Sitefinity templates and views. I have created a quick 5 min video showing in detail how to do all steps mentioned above.

The Progress Team
View all posts from The Progress Team on the Progress blog. Connect with us about all things application development and deployment, data integration and digital business.
Comments
Topics
- Application Development
- Mobility
- Digital Experience
- Company and Community
- Data Platform
- Secure File Transfer
- Infrastructure Management
Sitefinity Training and Certification Now Available.
Let our experts teach you how to use Sitefinity's best-in-class features to deliver compelling digital experiences.
Learn MoreMore From Progress
Latest Stories
in Your Inbox
Subscribe to get all the news, info and tutorials you need to build better business apps and sites
Progress collects the Personal Information set out in our Privacy Policy and the Supplemental Privacy notice for residents of California and other US States and uses it for the purposes stated in that policy.
You can also ask us not to share your Personal Information to third parties here: Do Not Sell or Share My Info
We see that you have already chosen to receive marketing materials from us. If you wish to change this at any time you may do so by clicking here.
Thank you for your continued interest in Progress. Based on either your previous activity on our websites or our ongoing relationship, we will keep you updated on our products, solutions, services, company news and events. If you decide that you want to be removed from our mailing lists at any time, you can change your contact preferences by clicking here.
